


Wax melt safety is the practice of warming scented wax on a controlled heat source with proper ventilation, placement, and timing to avoid hazards. In Irving at 4943 Dominion Blvd, The Artisan Nook recommends UL-listed electric warmers, a 2–3 foot clearance, and 4-hour cycles. This guide explains how to use wax melts safely at home.
By The Artisan Nook Team • Last updated: May 27, 2026
Quick Summary
Use an electric wax warmer on a stable, heat-safe surface with 2–3 feet of clearance and a nearby open window. Add one wax cube, run in 3–4 hour sessions, and keep away from kids, pets, and drafts. Let wax cool fully before cleaning or switching scents to prevent spills and burns.
Here’s the fast track to safer fragrance with wax melts from The Artisan Nook:
- Choose the right warmer: Electric, UL-listed, 15–25 W plate or bulb styles are ideal.
- Ventilate: Crack a window and avoid enclosed, unventilated rooms.
- Dose correctly: Start with one cube; add a half-cube only if needed.
- Time your sessions: Use 3–4 hour on-cycles, then rest 30–60 minutes.
- Place safely: Keep 2–3 ft from fabrics, papers, and high-traffic edges.
- Cool before handling: Wait until wax is fully set to remove or swap.
Introduction
Wax melts deliver flameless fragrance by gently warming scented wax until it releases aroma. Safer use depends on proper warmer choice, smart placement, ventilation, and session length. Follow the steps below to prevent spills, overheating, and distraction-related risks while getting consistent scent throw.
Wax melts are a simple, cozy way to scent your space—no open flame required. Still, heat is heat. A few practical habits make all the difference between a delightful evening and a mess you’ll regret.
In this how-to, we’ll anchor tips to The Artisan Nook’s nature-inspired collections and real-life routines in Irving, TX. You’ll learn:
- Which warmers pair best with artisan wax blends
- Exactly where to place a warmer for steady scent and safety
- How to run 3–4 hour sessions that maximize fragrance and minimize risk
- Cleanup methods to switch scents without residue
- Troubleshooting for weak scent throw, lingering odors, and uneven warming
Before You Start (Prerequisites)
Confirm you have a UL-listed electric warmer, a heat-safe surface, ventilation, and wax melts stored in a cool, dry place. Clear a 2–3 foot radius around the warmer, keep cords tidy, and plan 3–4 hour sessions with 30–60 minute cool-downs to protect surfaces and prevent overheating.
Set up right and you’ll avoid 90% of common wax melt issues. A few essentials matter up front.
Tools and supplies you’ll need
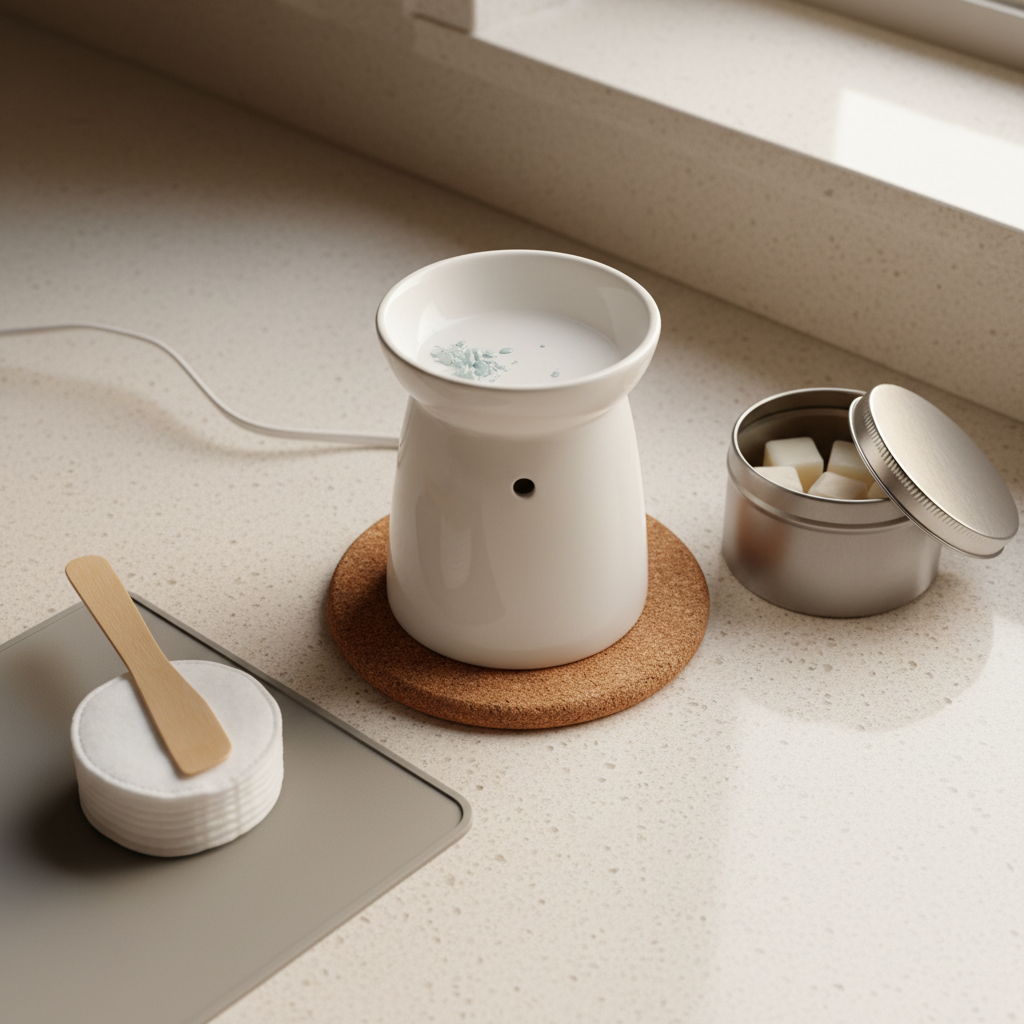
- Electric wax warmer: Plate or bulb style, UL-listed; many models draw about 15–25 watts.
- Heat-safe surface: Ceramic tray, trivet, or stone coaster to buffer heat.
- Ventilation: A slightly open window or a door ajar to keep air fresh.
- Wax melts: Store in a lidded tin away from heat and sunlight to retain aroma.
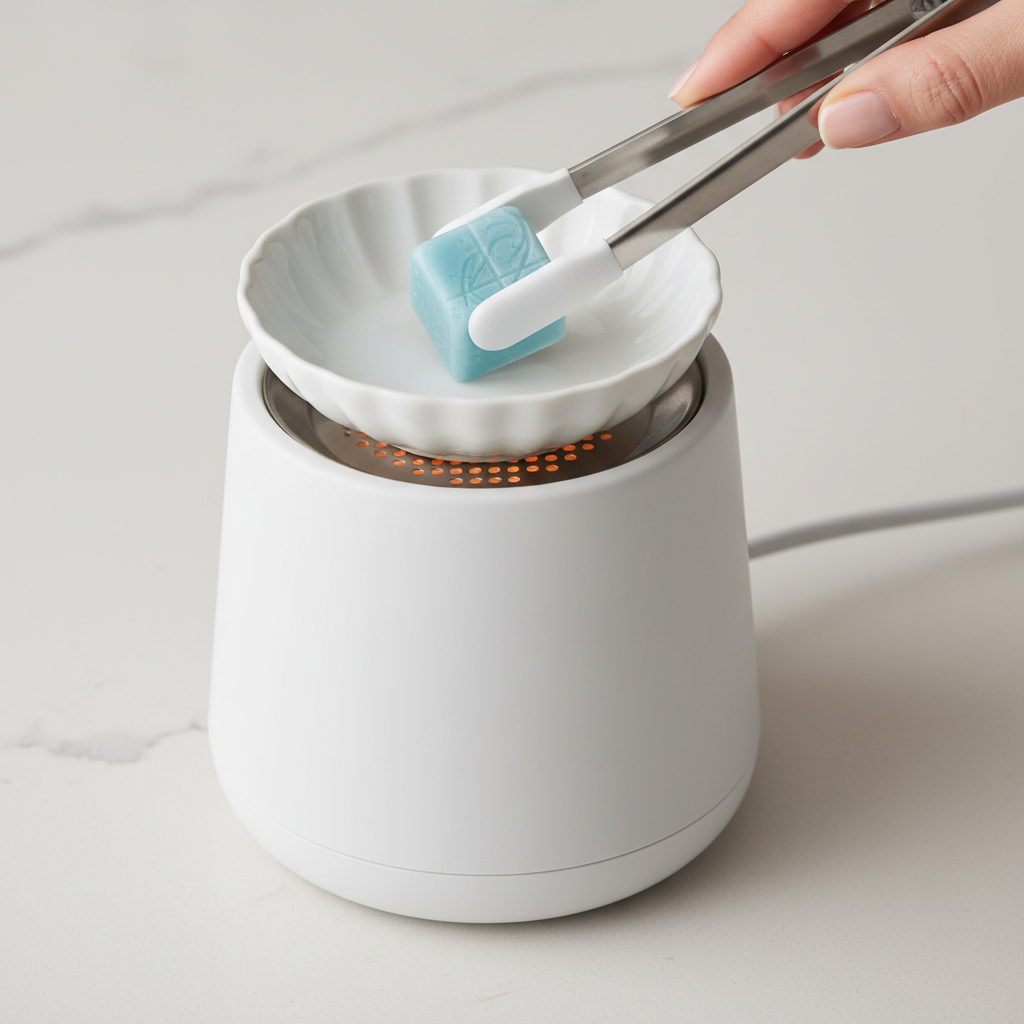
- Cleanup kit: Cotton pads/balls, silicone-tipped tongs, and a wooden spatula.
Placement and clearance
- Clearance zone: Maintain 2–3 ft from curtains, papers, or hanging plants.
- Overhead space: Keep 12 inches of vertical clearance above the dish.
- Traffic check: Avoid table edges and kids’ or pets’ paths; cable-manage cords.
Fragrance planning with The Artisan Nook
- Fresh & airy: Rotate nature-forward blends from our wax melt collection for daytime focus.
- Cozy evenings: Pair melts with a complementary candle (see wax melts vs candles) to layer depth without overpowering.
- Gifting game: For housewarmings, add a warmer and a pairing idea card to your bundle.
Step-by-Step Process
Start with one wax cube in a clean dish. Turn on the electric warmer and ventilate the room. Run for 3–4 hours, then power off and let the wax cool flat. Wipe or lift set wax to switch scents. Keep hands dry, cords tidy, and the unit away from edges and drafts.
1) Prepare your setup (2 minutes)
- Place warmer on a heat-safe tray with 2–3 ft clearance on all sides.
- Crack a window for gentle cross-breeze; avoid pointing fans directly at the dish.
- Confirm the dish is clean and dry; residual oil can mute new scents by up to half.
2) Add your melt (30 seconds)
- Start with one cube. Most rooms reach a steady scent level within 20–30 minutes.
- If the room is larger than 200–250 sq ft, add another half cube only if needed.
- Avoid overfilling; a dish that’s more than 3/4 full risks sloshing when bumped.
3) Warm in cycles (3–4 hours)
- Use 3–4 hour sessions, then rest 30–60 minutes to preserve fragrance molecules.
- Most UL-listed warmers stabilize heat in 10–12 minutes—watch for uniform liquefy.
- Keep children and pets at least 3 ft away to reduce spill risk.
4) Evaluate and adjust
- If scent is too light, verify ventilation first; then add a half-cube.
- If scent is too strong, shorten session time to 2–3 hours or open airflow.
- Rotate scent families (fresh, floral, woody) to prevent nose fatigue after 30–45 minutes.
5) Power down and cool (15–30 minutes)
- Turn off the warmer before moving the dish; hot wax can burn skin on contact.
- Let the wax cool to a solid; most setups set within 15–30 minutes.
- Once set, lift the puck out or absorb with cotton pads for a clean switch.
6) Clean and store
- Wipe the dish with a cotton pad while slightly warm for easier residue removal.
- Store unused melts in a cool, dark spot to retain top notes over weeks.
- Unplug the unit when not in use; inspect the cord monthly for wear.
Troubleshooting Common Issues
Weak scent, uneven melting, or lingering odors usually trace back to ventilation, overfilling, or residue. Right-size your wax dose, clean the dish between scents, and run shorter 2–3 hour sessions. Keep airflow gentle and consistent so fragrance diffuses instead of dissipating too fast.
Weak scent throw
- Check airflow: If a fan points at the dish, aroma disperses too quickly.
- Right-size the dose: One cube is standard; add only a half if room is larger.
- Reset the dish: Residue mutes new blends—wipe while slightly warm.
Uneven melt or hot spots
- Level the base: A tilted surface pools wax on one side.
- Dish fit: Use the manufacturer’s dish; tall-walled dishes trap heat.
- Session length: 3–4 hours yields uniform liquefy without stressing the unit.
Lingering or mixed odors
- Switch families: Go from gourmand to citrus-fresh between days to reset senses.
- Full cool and wipe: Removing the set puck prevents note-clashing.
- Open window: A 10–15 minute air change refreshes the room quickly.
Spills and surface safety
- Let it set: Don’t wipe hot wax; allow to cool, then lift with a spatula.
- Use protectors: A ceramic tray or trivet under the warmer prevents rings.
- Cable discipline: Route cords behind furniture to remove snag hazards.
Advanced Tips for Pros
For steadier, longer-lasting fragrance, rotate scent families weekly, run shorter cycles more often, and keep dishes spotless. Place warmers at nose level when seated, and pair wax melts with complementary candles to layer depth without overpowering smaller rooms.
Once you’ve covered the basics, these pro moves refine performance and consistency.
- Layering strategy: Use our pairing ideas to combine a subtle melt with a gentle candle for depth.
- Scent fatigue fix: After ~45 minutes, your nose adapts; step out for 5 minutes to re-perceive detail.
- Time of day: Fresh, green notes pop in daylight; cozy spices shine after dusk—plan sessions accordingly.
- Seat-height placement: Position the warmer ~30–36 inches high for better diffusion where you relax.
- Change frequency: Many users refresh a cube after 8–12 active hours, depending on airflow.
| Factor | Wax Melts (Electric) | Candles (Flame) |
|---|---|---|
| Heat Source | Electric warmer, steady 15–25 W | Open flame |
| Ventilation | Open a window 1–2 inches | Open a window; avoid drafts that bend the flame |
| Session Length | 3–4 hours on, 30–60 minutes off | 2–3 hours, trim wick to 1/4 inch |
| Surface Risk | Use trivet; cool before moving | Use heat mat; never move lit |
| Layering | Easy scent layering at low heat | Layer carefully; watch heat build |
Curious about differences beyond safety? Explore our guide on wax melts vs candles for deeper comparisons on scent throw and mood.
Local considerations for Broadmoor Hills
- Windows and cross-breeze: In Broadmoor Hills (Dallas County), light Texas winds often help ventilation—crack a window near the living space, especially when warming spicier blends.
- Seasonal heat: Hot summers can soften stored wax; keep melts in a cool cabinet, not near sun-lit areas facing W.O. Harrington Park or other bright exposures.
- Family zones: If kids play after a visit to Dorris Park, position warmers higher and deeper on shelves to avoid bump risks.
Health and Air Quality Notes
Good ventilation is the simplest way to support indoor air quality while using wax melts. Open a window 1–2 inches, avoid enclosed rooms, and rotate off after 3–4 hours. Keep products away from pets and do not ingest. Always follow your warmer’s manufacturer instructions.
Looking for seasonal scent planning and broader fragrance context? These pieces can help frame choices without dictating your personal preferences:
Browse ideas on seasonal scents, understand craft approaches from a perfumery process story, and consider how to build a fragrance wardrobe that evolves with your space.
Need a hand choosing? See our Wax Melts Guide for Beginners or shop the latest wax melt collection. For gifting, pair melts with a candle and a keepsake from our customizable essentials.
Safety Do’s and Don’ts
Do use a UL-listed warmer, ventilate, and time sessions. Don’t place near edges, fabrics, or direct fans, and don’t move the unit while hot. Keep kids and pets 3 feet away, unplug when idle, and store melts in a cool, dark place to preserve scent quality.
Do
- Use a stable, heat-safe base and manage cords.
- Crack a window for a gentle air exchange.
- Start with one cube and adjust slowly.
- Let wax fully cool before removal.
- Wipe dishes between scent swaps to avoid muddling.
Don’t
- Don’t leave operating units unattended for long stretches.
- Don’t overfill the dish past 3/4 capacity.
- Don’t position on wobbling shelves or desk edges.
- Don’t allow kids or pets to reach the unit.
- Don’t ingest wax or apply hot wax to skin.
Free Scent Pairing Mini-Consult
Want a custom pairing plan for your next cozy evening? Explore our curated melts and quick-start tips, then message us for a complimentary scent pairing suggestion tailored to your room size and routine.
Tell us your room size and the mood you want—fresh, floral, woody, or gourmand—and we’ll recommend a quick combo. Start with our wax melts and skim the beginner’s guide for a 5-minute setup checklist.
Frequently Asked Questions
Most wax melt safety questions center on warmer type, session time, and cleanup. Use an electric, UL-listed warmer; run in 3–4 hour cycles; cool fully before removal; and ventilate the room. Keep units out of reach and away from edges to avoid accidental bumps or spills.
How many wax melt cubes should I use at once?
Start with one cube. In larger rooms (over ~200–250 sq ft), add only a half cube if needed. Overfilling a dish beyond three-quarters increases spill risk when bumped and can mute scent.
How long should I run my wax warmer?
Use 3–4 hour sessions, then rest 30–60 minutes. This balances consistent scent with safe operating temperatures and helps your wax last longer without overheating the fragrance.
Can I use candle jars or bowls as a wax melt dish?
Stick with the warmer’s own dish or manufacturer-approved replacements. Random containers may trap heat, tilt, or crack from thermal stress, causing spills or surface damage.
What’s the safest way to switch scents?
Power off, wait until the wax fully sets, then lift the puck or absorb it with cotton pads. Wipe the dish while slightly warm to remove residual oils before adding a new cube.
Key Takeaways
Choose an electric, UL-listed warmer, ventilate, and run shorter cycles. Keep a 2–3 foot clearance zone, start with one cube, and cool fully before handling. Clean dishes between scents, manage cords, and store wax in a cool, dark place for consistent, safer scent.
- Electric, UL-listed warmers offer steady heat without a flame.
- Ventilation and 3–4 hour sessions keep air fresh and performance steady.
- Placement and cord management prevent bumps and spills.
- Clean, cool swaps preserve fragrance clarity between blends.
Additional Resources
Build confidence with a quick-start checklist, deeper comparisons, and pairing ideas. Start with our beginner’s guide, compare melts and candles, then browse the wax melt collection to apply what you’ve learned right away.
- Kickstart setup with the Beginner’s Wax Melt Guide.
- See how melts differ from candles in our comparison guide.
- Apply layering ideas from pairing suggestions.
- Explore current scents in the wax melt collection.
Conclusion
Safe wax melt use comes down to steady electric heat, smart placement, and airflow. Run shorter sessions, keep a 2–3 foot clearance zone, and cool fully before handling. With these habits, you’ll enjoy consistent fragrance and a relaxed home routine—no open flame required.
Here’s the thing—small habits compound. A stable base, one cube at a time, and regular ventilation give you cleaner air and better scent. If you’re layering fragrances, scan our ideas and start with a 3-hour session this evening. You’ll smell the difference.